|
You have been redirected to this screen since your Internet Explorer Settings are not configured to use SecureXFlow. SecureXFlow
requires Windows
Operating System with Internet Explorer version 6.0 or higher. Operating Systems that are tested and supported include Windows XP, Windows 2000, Windows Vista and Windows 7.
The following steps will configure Internet Explorer settings properly, and, ensure that all your clinicians can use SecureXFlow effectively.
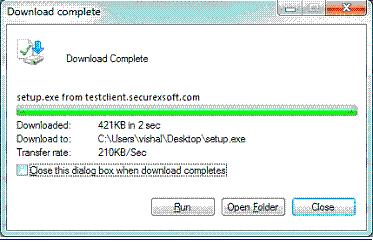
Step 1: Click on download and select "Save" to download the setup on your desktop.
Step 2: Once download is complete, hit "Run" to install SecureXFlow on your PC.
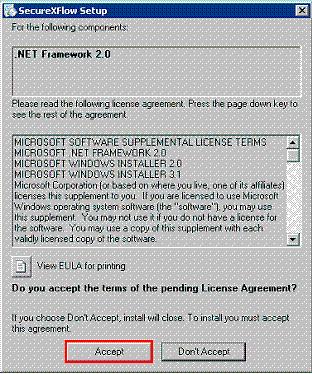
Step 3: If your PC does not have .NET Framework installed, it will take you to the below screen. Click on "Accept" to install .NET Framework.
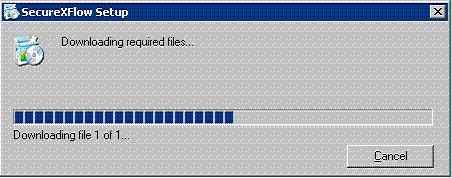
Step 4: Follow on screen prompts. The image below is the beginning of SecureXFlow set up. Click "Next"to start.
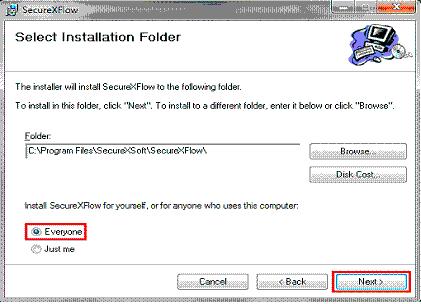
Step 5: By default the software will be installed on the 'C' drive. Also, make sure that you click "Everyone" and hit "Next" as shown below.
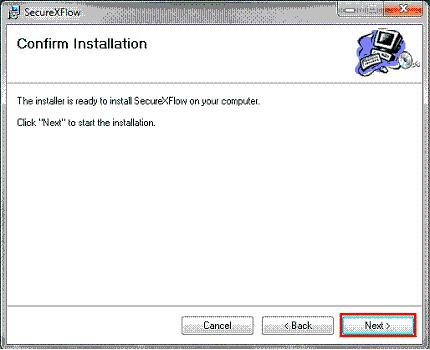
Step 6: Now the setup process for installation is ready. Click “Next” as shown below to start the installation.
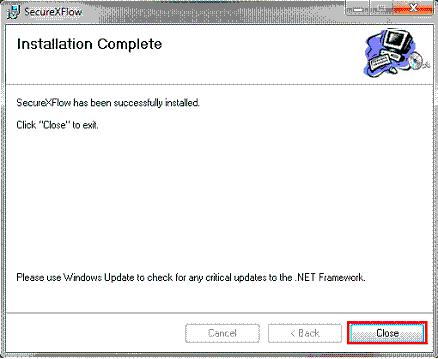
Step 7: Once the installation is completed successfully, you will receive a message as shown below:
Click “Close” to complete the installation.
Step 8: Once the installation is completed, you can see an icon  on your desktop. Double-click on the icon to open your SecureXFlow login page. on your desktop. Double-click on the icon to open your SecureXFlow login page.
Trusted Sites
Please note that the trusted sites should contain any of the below URL for SecureXFlow to function correctly. This is automatically added when the above setup is completed.
https://*.securexsoft.com
https://secureweb1.securexsoft.com
Feel free to contact Customer Support at 866-510-1111 Ext: 11 if you need help during the installation. |